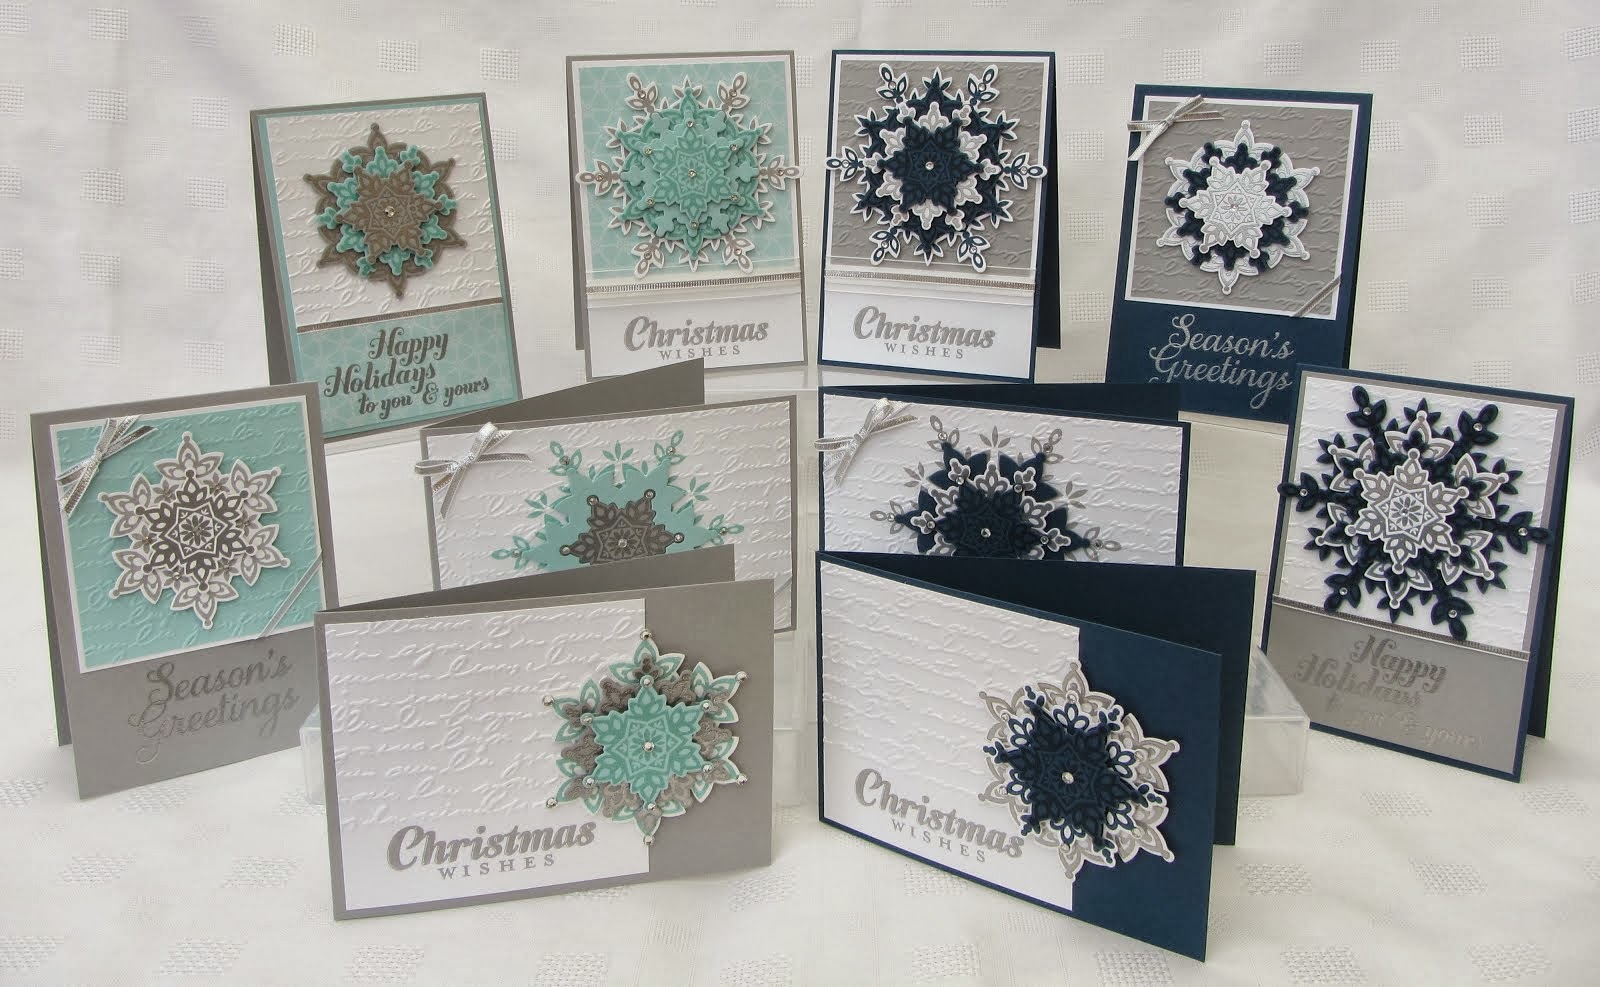
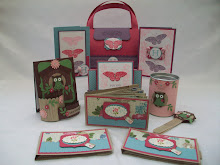
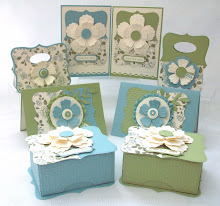
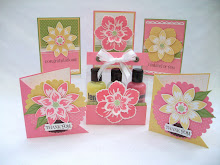
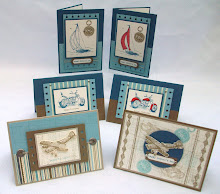
Tuesday, 7 July 2009

Scandinavian Season......

Its Christmas Project's for the whole of July......

I am determinate to get ahead for this Christmas.....Say that every Christmas but I hope to achieve it this year.

The Stamp Set is Scandinavian Season and the Papers are Ski Slope, both available until 30th September from the Mini Catalogue.

We made this cute Gift Box with Hot Chocolate ingredients inside.

A Slider card - Just for Jean :-)


Very Simple designs - Easy to make a few of.


The sentiment is from the Occasional Greetings Stamp Set. Probably easier to punch out the Snowflake but my ladies LOVE to cut out!!! Hee Hee


This is the insert. Just pull on the ribbon and it comes out.


A Very Simple card.
So what are you waiting for? Are you going to be prepared this year?
Thanks for looking,
Jenny:-)xx


Monday, 29 June 2009

Tart & Tangy Stamp Class.......

Where has June Gone? Tomorrow is my Tart & Tangy Class, the last Class for this Month.
We are going to make these. One of Lauren's Picnic Baskets and a Gift pack of Magnets. The template for the Picnic Basket can be purchased from Papertrey and the Template for the box of Magnets is one of Andrea Walford's. Remember the Peppermint Patty Template she kindly designed for everyone to download. The magnets are from Asda 46p for about 30......

As usual I always make another project in a different colourway. I started with the Summer Picnic papers as these Match the Tart & Tangy Stamp Set so beautifully. The colours are So Saffron and Pumpkine Pie.


I added some of the striped So Saffron ribbon from the Mini Catalogue and the sentiment is from Bella's Bloom Stamp Set.


Look at all these Oranges & Lemons. The basket has some Marmalade inside. Purchased from Asda today - YES Ladies I told the Check out lady what I wanted the lovely Jar of Marmalade (No I didn't have time to make Marmalade it was CAKES today).
The Lady must have thought I was totally Mad! Then she started asking about my Cards and she said she makes Cards as well - Hey! Its a small world - FULL of Crafters.........:-) Not Mad after all then.


These are the same Magnets but in Oranges and Lemons.


Remember these, I had one left. A Calendar made using the Magnets from Staples. See at my Launch Party last Year when the new Catalogue came out to find all the others made from the Tart & Tangy Stamp Set.

A few weeks ago I joined Stamp with Us and Monica designed a little box for Love Notes which have come in perfectly for these diddie cards. They are all Love Notes from the Catalogue and using the Cherries from the Stamp Set.


The cherries look so cute cut out.


Anyway Must run, Should be at Craft Club by now,
Thanks for looking,
Jenny:-)xx


A Beautiful Thing.......FREE Stamp Set Up for Grabs.

At the Taunton Training Day we were very lucky to receive a Stamp Set from Stampin' Up! called A Beautiful Thing.

I already have this Stamp Set and I thought what better way of Sharing than to Offer this Beautiful Stamp Set to someone for FREE.

Would you like to have a fun Party at home, invite a few family & friends, neighbours, or colleagues and do some Stamping - ALL Completely FREE.

If you like BINGO, I will be doing STAMPIN' UP! Bingo at all my Parties from now on -Which is Such great fun!

So I will be offering the First Person to Email me with a Party Booking, this Stamp Set for Absolutely Nothing.

Stampin' Up! Is Extremely Generous to their Hostesses with the Hostess Benefits. All the Hostess Stamp Sets are Exclusive and Can not be Purchased - So Do you want to own one of them plus Money to spend in the Catalogue.

Its so Easy just Email me to book a Party, I am happy to do a Day Time or Night Time Party.
For the card, I used the colours of a Body Shop Foot Product......I find Inspiration in the most unusual places.....
The cardstock used is Basic Black, Taken with Teal, Tempting Turquiose, Pretty in Pink and Whisper White. I used so many punches as well - Love the Punches! The large Oval Punch fits perfectly in the Round Tab Punch, Don't you think?

These are all the Stamps you get in this Stamp Set - A Beautiful Thing.
Thanks for looking,
Jenny:-)xx


Sunday, 28 June 2009

Taunton Swap Cards.....

Wow! Look at all these lovely Swap cards from the Taunton Training Day yesterday.

Hope to be back later if I can sprint through the ironing pile!

I have another project in the Craft Stamper magazine this month. The magazine is normally out in the shops around the 5th, its using the Bloomin' Beauty Stamp Set.

Thanks for looking,

Jenny:-)xx

Saturday, 27 June 2009

Taunton Demonstrator Training Day......

What better way to spend an Afternoon - Stamping with Stampin' UP! ........

Not only Stamping but I got to meet up with some of my Downline.

On the back row is Judy, Jane, Maria, Jackie(Not in my Downline)

On the front row is Me, Kate, Val and Jo

These ladies were all great fun - Love them ALL to bits. We were laughing so much on the last bit off our journey that my cheeks are still hurting.....

This is what I had hoped joining Stampin UP back in November 2007 would be.

It is all that I wished and MORE! What a fantastic HOBBY to have plus getting to meet up with like minded people, who I now call my friends.

The Training was held by our UK Manager Paula. Oh My! She is such a gorgeous person. She is always there to help out and her Training is really motivating.

Kelly and Paula love to Stamp as well - They made two beautiful projects for our Make & Takes and they even made themselves Party Hats........What a good Party it was.

If you fancy going to a Party near you, Contact your Local Demonstrator. You can find the nearest to you on the Stampin UP Website under Demonstrator Finder. Locate your nearest Demonstrator and send a message - It really is easy as that and they will contact you back........

I'll upload all my swaps tomorrow but for now I need my bed,

Thanks for looking,
Jenny:-)xx

Thursday, 25 June 2009

Happiness Always.........

I apologise now for the Mega Post but I thought I would do a Tutorial for you on the Flip Card....

You can see lots of these cards on other Blogs and Splitcoaststampers but I haven't made one before because I didn't like that it didn't stand up. I do like the cards that stand up!!! But Hey! I thought of a way of attaching it to a Base card, so I thought I would show you Guys. Thanks to Tracey - Who emailed me last week and told me a way of uploading more than 5 photos at a time, this is all now on one Post! Thanks Tracey it was so Kind of you - It had been a Bug Bear of mine when uploading to my Blog......
This is the Flip Card - Standing up Hee! The Stamp Set is a Gorgeous one - Happiness Always Level 3 Hostess Stamp Set - Email me and I will tell you how to get your hands on this Stamp Set for FREE!
I added an insert as normal. The cardstock is So Saffron, Regal Rose, Chocolate Chip, Whisper White. The inks are the same but the butterfly is stamped first in Regal Rose and then Rose Red is stamped over the top with the other butterfly. This set is a Two Step Stamping one!
This is another Triangle Box, You can find the instructions on Splitcoast stampers site.
Finally a Slider Card - I have made 25 of these!

Right Then! Let's get Started.


Cut some Regal Rose Cardstock and Chocolate Chip Cardstock 10cm x 8.5cm each.
Stamp on the Chocolate Chip layer and use a Border punch for the top, I used our Scallop Edge Love it! I added a layer of So Saffron 9.5cm x 8cm, then some So Saffron paper 9cm x 7.5cm.

Punch out a Round Tab (I changed the colour of mine on the final card to Chocolate Chip!) I used the Totally Tabs Stamp Set and then punched it out with the Round Tab Punch.

This is the hidden message layer 9cm x 13cm, I stamped just the top half, in Regal Rose, So Saffron and added a Curvy Verses in Chocolate Chip.
Tricky Part coming up......

Take hold of the whisper white layer and lay over the top the Regal Rose and then the Chocolate Chip layers. The Chocolate Chip layer needs to be over lapping the Regal Rose by about 1.5cm ish.....

HOLD TIGHT! Keeping the layers together use a 1/16 handheld circle punch and punch a hole, I did mine in the first full scallop.


This is what the back is like when you are holding all the layers together - Did I say HOLD TIGHT!

I had to let go of mine to Photograph it for you but YOU MUST KEEP HOLDING IT and Punch at the same time. Insert a Gold brad and split it at the back of the whisper white layer.
Turn over the layers and twist around the chocolate chip layer so you can add the double sided tape. Add the tape to the back of the stamped whisper white layer as well.
Take off the backing of the Chocolate Chip layer and Twist it back around to the front, making sure you line up the card evenly around the whisper white layer.
Then take a normal sized base card, ie half a sheet of A4 cut in half and then folded in half. I used So Saffron. Take off the backing tape of the whisper white layer and add to the base card as shown. There you have a card that has a Flip Front but even better stands Up!!
Decorate the Front as you wish. I used a couple of nestie circles and the sentiment is Sincere Salutations. I LOVE these Butterflies. They are stamped on Whisper White, First in Regal Rose and then Rose Red......
Add to the front of the card half over the centre. Only add foam pads to the top half and then it will move when you pull on the Round Tab Punch.....
This is what happens when you pull on the Round Tab Punch - It justs fits in the Stampin Up Envelope.......
Hope you found this Tutorial Helpful - Sorry for it being such a Long Post!!!

Thanks for looking,

jenny:-)xx

Wednesday, 24 June 2009

Die Cut Blooms with Lauren's Cardcouture

It always amazes me what you can do with a couple pieces of cardstock....
This is another one of Lauren's Templates - Cardcouture. With very little stamping, actually I only stamped the sentiments. The rest are Stampin Up Blooms Die Cut Flowers. The cardstock is Brocade Blue again! The paper is Summer Picnic. It holds slider cards perfectly.
The sides are covered with the other side of the Summer Picnic papers, which go so well with Brocade Blue or Bashful Blue.

This is the Slider card open, when you pull on the ribbon the inside slides out. I have made so many of these in my time - Love them. Can you see the stamping? Hee! Hee!


Nearly all the layers are popped up with dimensionals. The cute button is from the Mini Catalogue. Can you believe this is the first time I have used this nestie shape as well?????? Tut! Tut! I don't normally put white against white but the combination of Whisper White plain and Whisper White Textured looks nice (Well I thought so anyway).


You can see all the compartments on the inside of the box.

This shows the slider card sitting inside the first compartment.

Must dash! As I have so much work to do today, Well actually for the next couple of weeks - I could scream!!!

Thanks for looking,
Jenny:-)xx


Tuesday, 23 June 2009

Summer By the Sea Shadow Card

I really enjoy making these Shadow Box cards. They are so quick and easy....

You can get two from one piece of A4 cardstock. Even Better, they fold flat and fit in a normal size envelope.

I used the nesties to make the circle cut out and the Frame to go around on the front. You just need to layer 2 nesties together and run it through which ever machine you use (I use a Big Shot).

The front is stamped with the Canvas Background stamp in Real Red. I used the Markers to colour in the boy and layered him on some embossed Brocade Blue. The embossing folder is called Tiny Bubbles by cuttlebug.

You can see the inside better here.

Hope you have a nice day,
Thanks for looking,
Jenny:-)xx

Monday, 22 June 2009

Summer Picnic Basket.....

These would make cute Gifts for Teachers. Although I don't think my 14 & 13 year old Boys would take them into School - Do you? Hee! Hee! The Stamp set is Tart & Tangy and the papers are Summer Picnic. The cardstock is Old Olive and Real Red.
I popped up all the layers on the lid, you can see that better in this photo.
I pricked all around the edge of the Nestie Labels die and on the Scallop circle punch out. I love that effect. To get the different colours on the image, I used the SU Markers and then stamped on whisper white. These were punched out using the 1 1/4" circle punch.
The little Picnic Box is so Cute. It is just as sturdy as the large one.

Anyway must dash!
Thanks for Looking,
Jenny:-)xx

Sunday, 21 June 2009

Summer By the Sea Stamp Class........

Lots of Bashful Blue on these three cards....
These are what we will be making this week, for my Stampin Up! Class.

What NO 3D Project? Hee Next Week there's a 3D Project, but this week I thought a lovely bit of colouring in...Hee! Hee! Thats what my hubbie says to me - Colouring In Today?
The base card is Bashful Blue, a square card for a change. The front was split in half and cut away. I added some textured whisper white to the panel that was left. The scallop square is in Close to Cocoa, then Bashful Blue. The ribbon is whisper white 1/4" grosgrain. I used the SU markers to colour in the girl.
This is the inside, more Bashful Blue designer paper.

The card was made using the Curvy Rectangle Nestie die, cut just over the folded basecard. What a lovely shape. The base is Cameo Coral. The embossing folder is swiss dots and the ribbon is kraft taffeta. Again the image was coloured in using the SU Markers and some sponging for the sky....


This is a very simple Anniversary card. The background is sanded and seaside stamp sets.

Hope to be back tomorrow with some more of Laurens Picnic Baskets. They are so addictive....

Thanks for looking,
Jenny:-)xx


Thursday, 18 June 2009

Corner Bookmark Tutorial...

These are just so easy to make and What a lovely Gift to give someone. I made the Corner Bookmarks on Monday for everyone at my Workshop using the Petal Pizzazz Stamp Set but I found a beautiful card on Splitcoaststampers by Mary, You can see Mary's here. I liked it so much, I decided to use that stamp set and the colours from the UK Stampin' Up! Catalogue..... You can see the card on Page 10 of the current catalogue. The Stamp Set is Organic Grace.
This is the inside of the card. I used all Textured cardstock for this card. Even the Very Vanilla is Textured. You can buy assorted packs of the Textured cardstock in 12 x 12 and you get 2 sheets of each colour in the family.
Right Then.....

To make this Corner Bookmark.

You need one piece 5" x 5" in More Mustard
one piece 4 1/2" x 4 1/2" in Real Red
one piece of 4" x 4" in Very Vanilla

Score the 5" x 5" from corner to corner.

Cut the other layers into 4 Triangles.

(To Make the Petal Pizzazz bookmark you need one piece of cardstock 5" x 5" and one piece of Designer paper 4 1/2" x 4 1/2")Score from corner to corner on the 5" x 5" piece of cardstock. I used my cutter to do this with a bone folder. Or if you have a Scor-pal use that as well.

Cut away one triangle piece as shown.

Tip: I always take out the score lines, when ever I make 3D items like boxes etc, this makes them fold up better.


This is one of the FREE Stamp Sets You could get your hands on for holding a workshop or clubbing together orders of £150, plus Don't forget about the £15 worth of FREE Products of your Choice as well. Email me to Book a Home Workshop or to place an Order. See Page 10 in the Catalogue.
Decorate the Very Vanilla Layer. I used More Mustard, Old Olive and Real Red. Add to the Real Red Triangle.
Add the decorated triangle layers as shown.
Fold along the score lines.
Keeping hold of the folded layers cut away the top corner, about as wide as the ribbon you want to use. I did it just over 1/4".
Add a piece of double sided tape to a piece of ribbon, More Mustard here, to either end.
Add the end of the ribbon just inside the corner.
Fold over the ribbon to make the lope, and adhere to the top of the cardstock. Add a strip of tape to the triangle as shown. This is the part you are going to close up.
Fold up the triangle to complete.
The is the completed Corner Bookmark. There told you it was easy peasey!

Thanks for looking,
Jenny:-)xx

Stampin' Up! Storage Ideas......

You all know how many times I have rearranged my Craft Room....

I am sure you are all the same as well....

I found these two Videos on Monday, which just made my laugh..Bless!

Mary has filmed all her great storage ideas...She is great fun.

See the first Video Here.

And her Second Video Here.

I'll be back later for the corner bookmark Tutorial......

Thanks for looking,
Jenny:-)xx

Tuesday, 16 June 2009

Petal Pizzazz - Basket & Corner Bookmark cards.

This is the little Basket I got up early to make....You can see lots of examples over at Laurens Blog & Mish Mash. Lauren has a list of all the other people who have made an example for the Template release. I used the Petal Pizzazz Stamp Set from the Mini Catalogue with the beautiful Washington Apple Designer Papers. The colours are Brocade Blue, Bashful Blue, Whisper White. I stamped tons of flowers in Ruby Red, Pumpkin Pie, So Saffron & Bashful Blue and cut them out leaving a white border. One of the flowers can be punched out using the Scallop Circle punch with made it quicker....

I demonstrated how to make the Corner Bookmark cards last night. Check back later for a Tutorial on these.
I just know I will be making more of these. I added a flower on the end of each handle.
Also on the back of the handles. The Ice rhinestone brads hold the handles on. I doubled up the cardstock on the handles to make it stronger.

The top is covered in flowers as well.

Check back later to see the Corner Bookmark Tutorial.

Thanks for looking,
Jenny:-)xx

Monday, 15 June 2009

Soft Summer Gift Bag & Cards........

Don't these Colours just remind you of a Lovely Summer's Day? I purchased the Soft Summer Class by Email last month from Andrea Walford, as I fell in love with this little bag. We don't have the papers in our UK catalogue so I swapped them for Tea Party instead. The colours are Pretty in Pink, Barely Banana and Whisper White. The ribbons are the striped grosgrain in the Mini Catalogue. I have ran out of these for a second time - Love them.


You can see the side detail of the bag better in this photo.

I have been up since 4.30am. I was so excited.....Lauren has released another couple of Templates and I think thats why I woke up early. I haven't done that in ages. I have made one already but I will show you it tomorrow, as it has a Gift inside for Dorset Stampers Tonight.

Pop over to Papertrey to purchase the templates - You won't be disappointed.

Thanks for looking,
Jenny:-)xx

Sunday, 14 June 2009

Soft Summer Stamp Class...

Its such nice weather here today.....

My little Craft room is so hot. Poor Sid is trying to find abit of shade, Bless Him!

This is the Project we will be making on Tuesday. Do you like the little Bird house?
You can find the Template over at Nicole Heady's Blog (Capture the Moment). The colours used is Sage Shadow, Close to Cocoa, Barely Banana and Very Vanilla. The roof is the large rectangle nesties.
I used the Oval Nesties for this card. Do you know I think I have worn out the Oval Nesties as the straight edge Oval is peeling!!! Anyone else had this problem?

What a lovely sentiment this is - Don't you think? I couldn't decide if I wanted to glitter the flowers or not....Mmm!

Anyway Must run,
Thanks for looking,
Jenny:-)xx

Saturday, 13 June 2009

Wow Flowers Backpack......Gift Set.

Arh! This is so cute.....
Over at Splitcoaststampers in the Resources Section is a Step by Step Tutorial on How to make one of these little Backpacks. Did I tell you how Cute they are....

I took the colourway from the Simply Sent Card Element set - Perfect Plum, Rose Red and Old Olive. Love this combination! The paper also has More Mustard mixed in with the other colours as well. I made the Six cards and Six Gift Tags to go inside it. The Stamp set that goes with this Card Element kit is WOW FLOWERS. As you can see I used the Circle Punches, they work so well with this Stamp Set. The Thank You also fits perfect on the Large Oval Punch as well....
The cardstock in the elements kit is Textured, so I made the actual Backpack in the Perfect Plum Textured. I used a circle nestie to make the curved pockets and flap. The large flower is one of the stickers that come with the kit. The backpack has a little handle on the top and two straps going over the back, I used the Whisper White Ribbon for this.
You can see the cards inside.....
Six little Gift Tags made from the Scallop Circle and some of the stickers fit perfectly in the cute front pocket. The kit also comes with ribbon, buttons and brads.

Silver Elastic cord from Stampin Up was also used.

Are you going to make one then?

Thanks for looking,
Jenny:-)xx

Wow Flowers Triangle Boxes.


More Triangle Boxes.....

Using the Wow Flowers Stamp Set. The Perfect Plum is the 'Its Beautiful' Wheel. The Old Olive is the 'Whimsy' Wheel and Rose Red is the flower from Wow Flowers stamped in Versamark.

The Thank You ones are where the A4 is cut in half widthways. The Birthday ones are where the A4 is cut in half lengthways.

Thanks for looking,
Jenny:-)xx

Friday, 12 June 2009

Mr & Mrs Gift Boxes

These are so very quick and easy to make...I have made this Triangle Gift Boxes for a number of years now and they have come in very useful. You can make three sizes (or more depending on your size of cardstock). These two are just half a sheet of A4 Cardstock. The Pale Plum on is Half a Sheet cut widthways and the Perfect Plum one is half a sheet of A4 Cut Lengthways. Therefore from one piece of A4 you can get two of the same size box.
I had been using the Mr & Mrs Stamp Set for my Class this week, so I made these two using that set. We will be making these Boxes on Monday night at Craft Club but using a Different Stamp Set. I used the Forever Flowers Stampin Around Standard Wheel to decorate the cardstock in Perfect Plum. This size wheel is the smaller one and there isn't a cartridge in Perfect Plum so I just inked it up rolling it on the Perfect Plum inkpad instead. This is a cheaper way of inking up the wheels, but to be totally honest if they had a smaller size perfect plum cartridge, I would buy it as its so easy with the cartridge inside. The wheel is constantly inked up......Oh Um!
I added a few bits from the Pretties Kit to decorate the front of the box. The pearls are just so great for Weddings - Don't you think? The nesties label dies just fitted on the front.
I used Elegant Eggplant ribbon to close the box and stamped the sentiment, then punched it out using the Oval Punches. Still not fed up with them. The Ovals and the Circles will always be my favourites.....
The main circle image is lovely cut out leaving a white border. You can punch out the dottie centre with the 1 3/8" circle punch. I stamped the image again in Pale Plum and punched out the centre and layered it up on top of the Perfect Plum one. The rhinestone is from the Pretties Kit. The flowers were coloured in with the Pale Plum and Mellow Moss Markers.

Thanks for looking,
Jenny:-)xx

Thursday, 11 June 2009

Stampin Up Banner.....and Blog Candy Winner.


Hee! Hee! Look what I made last night. You must know by now, How Much I LOVE Stampin Up! I was visiting Atomicbutterfly's Blog yesterday and She had made a Lovely Banner for her home. I have brought a couple of bigger notice boards for my room and I am in the process of decorating them with up to date card's I have made. So when I saw that beautiful banner, I just had to make one......Hee!

They are 4" x 6" pieces of designer paper flags, backed onto 4 1/2" x 6 1/2" whisper white layers. The papers are the new Washington Apple ones in the Mini Catalogue. For the actual flag part, you need to mark where the 2" is along the 4" side and cut at an angle along the 6" side. The cutter is brilliant for this. I then layered this onto the whisper white layer to make it stronger.

The pleated circles are also on Atomicbutterflys blog. I used 1 1/2" x 12" for mine, which make a 3" circle. I used my Scor-pal to do the score lines. I first scored along the piece of designer paper at every 1/2" and then moved the piece to the 1/4" line on the left hand side of the Scor-pal, then scored along the 1/2" marks. You end up with the paper scored at every 1/4". You fold up as normal for a pleat and glue the ends together. I used a foam pad to keep them in place flat until I was ready to glue them in place.

The letters are the Stampin UP Chipboard ones coloured with the Ruby Red Marker. This was glued onto the Scallop circles.

Right then I also did the Blog Candy Winner for the FREE USTAMP PASS FROM DAWN.

Random Org Picked......

VIV

So Congratulations Viv....Email Me and I will put you in touch with Dawn.

Just wanted to say a Big Thank You for all of you who kindly left me a Message, they really do make my day,

Thanks for looking,
Jenny:-)xx

Sunday, 7 June 2009

Mr & Mrs Stamp Class & Blog Candy Moment

I thought I would just give you a Sneak Peak of my Class on Tuesday as well as some exciting News.....

We will be using the Mr & Mrs Stamp Set in Perfect Plum and Pale Plum. When I got married 20 years ago, I remember lots of people handing me bits and bobs to hold, lucky charms etc. So I thought a nice little heart shape holdal would make a lovely gift to give to a Bride. I used my Heart nesties to make it. Also the impressables embossing plate was used to emboss the whisper white heart.
I love the plum cardstock and I forget to use it. The ribbon is Elegant Eggplant.


This is a very simple card. The base is Pale Plum and then some whisper white embossed with a cuttlebug folder. The centre image has Dazzling Diamonds on it, as well as the flowers.


The forever flowers wheel was used on this card. So Cute. I added two rhinestone brads in the centre of the flowers and some white taffeta tied in a bow around the two layers.


Well My Exciting News is.... Dawn over at UStamp has asked Me! Yes little Old Me to do a few Projects for her next round of UStamp. What is UStamp? Its an online Stamp Class where you can join other Stampers who also Enjoy using Stampin Up Products. Pop over to UStamp to Registrator - It starts the beginning of July.

Dawn kindly gave me a FREE Pass to Give Away as Blog Candy.

So Leave a Comment to this post and I will pick a Winner by Random Generator on Wednesday 10th June......Good Luck.

Thanks for looking,
Jenny:-)xx

Friday, 5 June 2009

Mr & Mrs Love Stories Scrapbook - Flip Album.

This is my first piece of Scrapbooking.......Shock!

This is the other Project I will be showing next week for the Mr and Mrs Stamp Class. Have you seen this Stamp Set? The Circle is just so very Beautiful....

I so enjoyed making this last Sunday - Hubby and one Son was at Cricket, and my youngest was lost in the world of the Xbox!!!!!

I started by finding the instructions over at SCS in the Demo Section. Then I picked up the LOVE STORIES Scrapbooking Kit and split it in half. You get 8 sheets of Textured cardstock, 6 Sheets of 12 x 12 paper, 6 sheets of Stickers (2 of 3 designs). The stickers are very very high Quality, more like cardstock really.


When you undo the ribbon and open at the scallop border, this is what you find inside.

I combined the Mr & Mrs Stamp Set with the papers. The colours are Close to Cocoa, Pretty in Pink, Bashful Blue and Certainly Celery.

I started off with a space for an Engagement Photo and the sticker in the middle for some notes and dates to remember.

I didn't use all the 3 sheets (half a pack) so the Kit goes a long long way.

Mr & Mrs Flip Album.....

Turn the page again and see this....

What beautiful words.....Keep thinking of the Love Story Music. It was in my head all day long after watching that lovely Music Arrangement. Did you like it?


Turn the page again and the whole inside of the Scrapbook is open. Yet there is still more right in the middle behind FOREVER.... Phew! It just fitted split on the two sides of the opening.


You can stand it up all by itself when the Scrapbook is fully open.
You can see the stamping under the white spaces for the photo's to be added.


This is the very Middle - Made it at last.

Its like a never ending book! OH! No I have an idea.

What do you think of my first piece of Scrapbooking then?

Thanks for looking,

Jenny :-)xx


Wednesday, 3 June 2009

Spend a couple of minutes and Listen to this.....

Watch and Listen to this

Have a Great Day,

Jenny:-)xx

Tuesday, 2 June 2009

Petal Pizzazz Stamp Class Other Project

What lovely weather today....

This was the other Project I showed today at Stamp Class. It still used the Washington Apple but I decided not to include any Ruby Red, so all the papers used mostly have the Pumpkin Pie, Bashful Blue and So Saffron on them.

I must admit I haven't really made any cards with this Stamp Set where I haven't had to cut out any of the flowers but I think they look so beautiful popped up with 3D foam pads.

Petal Pizzazz......

The cards are all 4 x 4 Square. So Saffron is the base for this one, then Pumpkin Pie and Washington Apple paper. A piece of Whisper white ribbon was added through the centre and a couple of Gold Brads were added at each end of the ribbon. The flower was stamped in Bashful Blue on Whisper White. I cut the flower out leaving a white border and added 5 Gold Brads where the white spots were. The centre part was cut away also and lifted up slightly. The Sentiment was stamped in Pumpkin Pie.
Pumpkin Pie is the Base for this card, then So Saffron and Washington Apple paper. I did a stay put knot with the Pumpkin Pie ribbon along the middle. The next layer is Pumpkin Pie and I pricked edges. Then I added a piece of So Saffron paper and a sentiment stamped on whisper white. The flower was stamped in Pumpkin Pie on Whisper white and cut out again leaving a white border.
Bashful Blue is the base for this card. Then a layer of Washington Apple. A piece of pumpkin pie and paper were added together and the edges pricked. The flower was stamped in So Saffron and cut out with the Scallop Circle Punch. The tiny Daisy flower is Pumpkin Pie and I used the handheld circle punch to punch out the white dots, then a rhinestone brad was added to the centre. Both flowers were popped up with foam pads.
This is the Hinged Box which holds the 4 x 4 cards. You can buy the instructions on Monicas Blog.
The Lid slides to one side to reveal the Goodies inside.

Hope you get to Stamp today!

Thanks for looking,
Jenny:-)xx

Monday, 1 June 2009

Petal Pizzazz Stamp Class......

Where have the last two week gone?

We had a lovely half term here but unfortunately that meant not much Crafting got done. Well not any that I can share with you all yet?

This is my Class Project for tomorrow. It is a Hinged Box (See earlier post under Fresh Cuts) and Three Cards. All using the Petal Pizzazz Stamp Set and Washington Apple Stamp Set. I took the colours from the Paper Pack, Ruby Red, Pumpkin Pie, Bashful Blue and So Saffron. Hope you Girlies remember your Paper Snips tomorrow - Lots of cutting out......Hee!
Check back later with the other set I made using this Stamp Set.

Hopefully I can get back to more Crafting this week.....Fingers Crossed.

Thanks for looking,
Jenny:-)xx